Partitioning the SSD Drive
So, the hardware is installed, and I've successfully booted from the Emergency USB recovery stick. What now? Partitioning the SSD drive of course. Now this may sound like a simple task and, in general, it is. The most difficult part is deciding how many partitions, what they will be used for, and how big each one should be.
After 38 years of using various Amiga systems, I've have settled on an arrangement that works well for me. Your mileage may vary. I find this makes it easy to find things, makes it easier to perform more frequent backups of critical items and allows for flexibility if I want to resize or replace a partition that might go bad. Fortunately, I have rarely had a partition on a hard drive go bad, but you never know.
After 38 years of using various Amiga systems, I've have settled on an arrangement that works well for me. Your mileage may vary. I find this makes it easy to find things, makes it easier to perform more frequent backups of critical items and allows for flexibility if I want to resize or replace a partition that might go bad. Fortunately, I have rarely had a partition on a hard drive go bad, but you never know.
Get to it Already
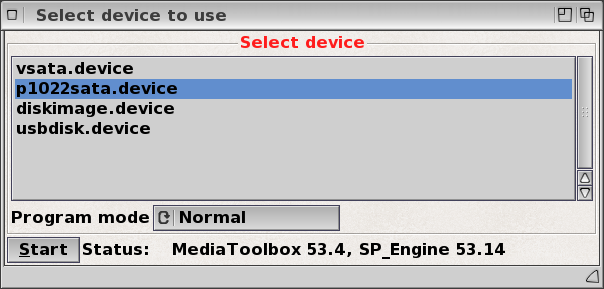
OK. First I boot from the SSD drive, went to the "SYS:System" drawer, and started "Media Toolbox". Then I selected the "p1022sata.device" and clicked "start".
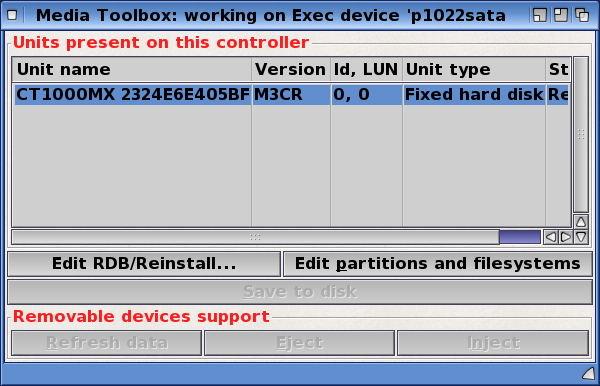
I then select the SSD drive from the units listed. If the drive hasn't been installed, click the "install" button then click "OK" at the next window. In my case, I had already installed the drive, so I clicked the "Edit partitions and filesystems" button.
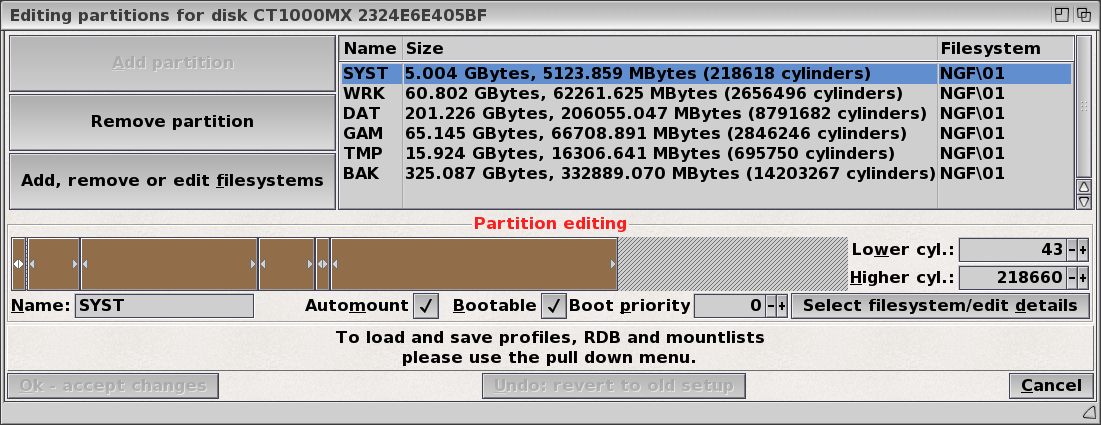
As you see below, I have created 6 different partitions using the, new, recommended, NGF\01 filesystem. I'll explain why I set it up this way later.
To set up each partition, I selected "Add partition". The "partition editing" bar turns green. I then adjusted the bar to set the size of the partition, gave the partition a "Name", and enabled "Automount". For the System partition, I also enabled "Bootable" and set the "Boot priority" to zero.
To set up each partition, I selected "Add partition". The "partition editing" bar turns green. I then adjusted the bar to set the size of the partition, gave the partition a "Name", and enabled "Automount". For the System partition, I also enabled "Bootable" and set the "Boot priority" to zero.
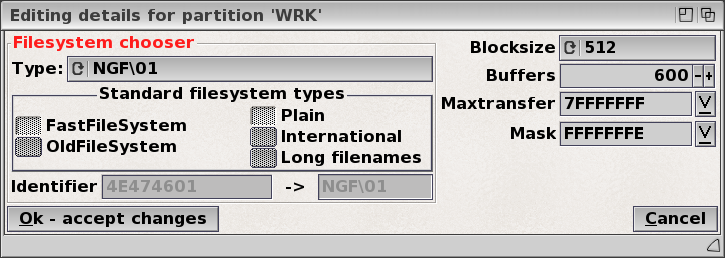
For each partition, I clicked on "Select filesystem/edit details" button to set the file system and other details. For "Type" I selected "NGF\01" as recommended by the A1222 Plus quick Start Guide. I also set the "Blocksize" to 512 as recommended. My understanding is that this will give the fastest read/write speeds. I left all other setting to defaults, then clicked "OK - accept charges".
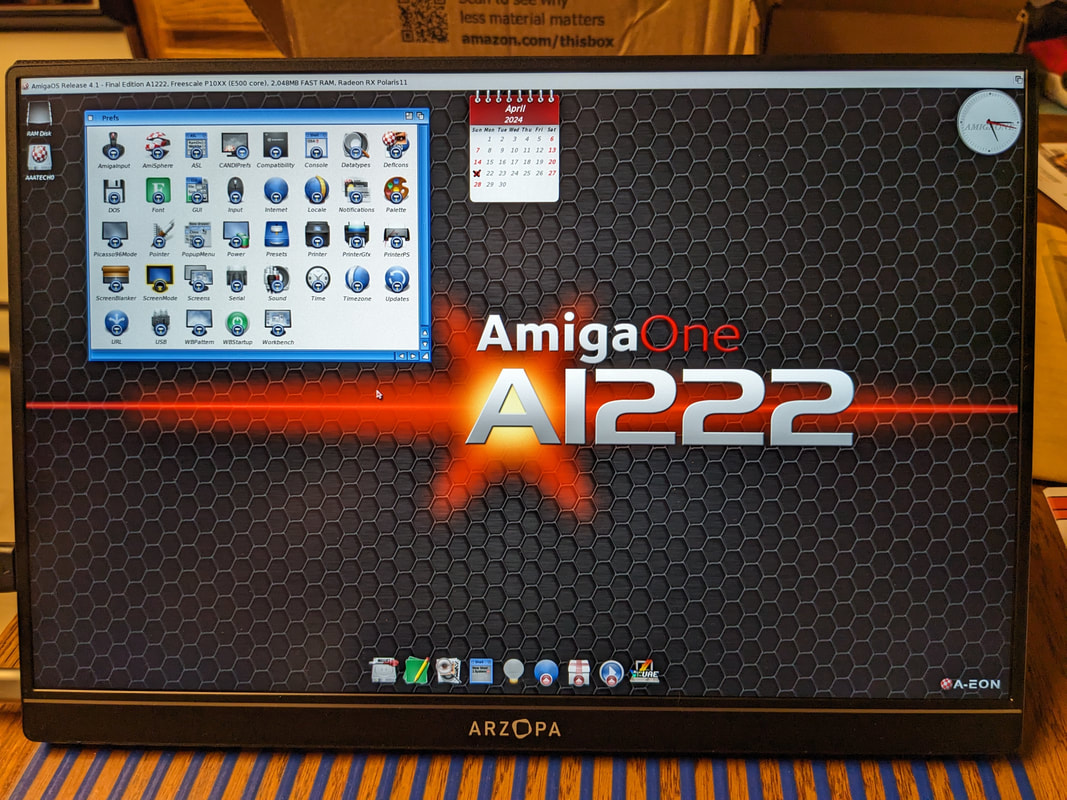
After setting up all the partitions, I clicked "OK - accept changes" on the "Editing partitions..." window. I was warned about losing any existing data, then asked about rebooting the system to activate the partitions. I accepted these dialogs and rebooted the system. Once rebooted, the partitions show up on the "Workbench Screen". See screen grab below.
About My Partitions
So, why did I partition the hard drive the way I did?
As mentioned earlier, I created 6 separate partitions to make backup easier and to make things easy to locate. The downside of all these partitions is it clutters the Workbench, but it is possible to disable the showing of the icons on the Workbench using the "Workbench" utility found in the "SYS:Prefs" drawer. I chose to disable the "Backup" and sometimes the "Temp" partitions.
I setup the following partitions:
System (SYST - 5GB):
This is where I installed the AmigaOS4 operating system and all its components. The A1222 Plus quick start guide recommends it be at least 1GB. I made mine 5GB as I have a 1TB hard drive and want to make sure I never run out of space for enhancer and other third-party libraries. Currently I'm using 1.4GB on my x1000 that I have had for around 10 years or more. I'd suggest a minimum of 3GB would be safe. This partition is relatively small and is quick to backup. This makes it easy to backup before I make any changes to it that have potential to do harm.
Work (WRK - 60GB):
This is where I put all the software application I install. I have created drawers covering general categories, like business, internet, audio, graphics, etc. and install related software into these directories. Note that I don't usually store " data" for the applications in these drawers. I store the data on the Data partition. I usually back this up after installing new software, or every one to two weeks.
Data (DAT - 200GB):
This is where I store almost all the data for the applications.It includes drawers to store SimpleMail Data, Pictures, Music, Videos, Documents, etc. In addition I have a drawer named "Downloads" where I store the latest archives of all the download software from OS4Depot and other companies. This allows me to have all the important data located in one partition for easy backup and archiving.
Games (GAM - 60GB):
This is where I install all games and associated data files. I only back this up once every three months or so.
Temp (TMP - 15GB):
This is where I store files that are intended to only be there temporarily. It might include things I download but won't get around to looking at until later. It is also where I created temporary locations for beta testing my own and others software. This partition doesn't get backed up very often.
Backup (BAK - 325GB):
This is where I regularly backup all the individual partitions. About once every 6 months or so I'll back this up to an external USB SSD Drive. It's large enough to be certain I will have room to back up all my partitions, except this one of course.
The rest of the drive, about 256GB is left un-partitioned. This space is large enough and reserved in case I need to replace or enlarge one of the other partitions.
There it is with all the gory details. On my x1000 I have a few more partitions. These include a Video partition for video editing, a Develop partition for developing software and an Emergency Boot partition, just in case. The Video and Emergency Boot partition are generally hidden.
Partitions Created - What's Next?
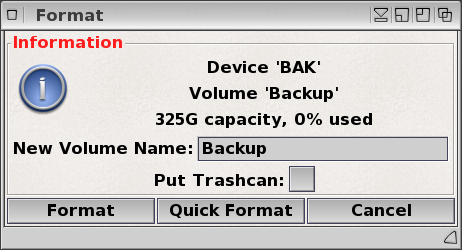
Now it's time to format the partitions. After the system reboots, icons for all the newly created partitions are displayed on the Workbench Screen. One by one I right clicked on the icons and selected "Format..." from the drop-down menu. I gave each one a volume name and unchecked "Put Trashcan" selection. Once setup, I selected "Quick Format". Note: Only use "Quick Format", especially on SSD drives.
Below you see a screenshot of the Workbench screen with all partitions showing. Looks clean to me. I like the default background of the A1222 Plus.
That's it for now. Next entry I'll talk about using the Logitech K400 PLUS wireless keyboard with touchpad. I've made several tweaks to the system to make it usable with the A1222 Plus.


 RSS Feed
